
3 of 5
Guide 2 — Adding & Configuring Devices
Lightspeed Bump Screen powered by Bump-it · Setup Guide 2 of 4
Add each screen, choose whether it is a bump screen or a pass screen, and set what staff can do on it.
Time required about 5 minutes per device
Before you start
- You MUST complete Guide 1 before starting this guide. Your subscription must be set before devices can be added.
- Each subscription includes one bump screen and one pass screen.
⚠️ Add each device on the device itself
Each device must be added on the device you are actually using in venue. This cannot be done remotely from a computer — if you try, you will add your own computer as the device instead.
You can set up iPads and Androids away from the venue, as long as you do it on the device itself.
Part A — Add the device
Step 1
On the device you want to set up, go to Sites and click Device on your site row.

Step 1 — The Device button is circled above.
Step 2
Click Add Current Device. On the Create Device page, enter a Device name for where it sits in the venue — for example Kitchen, Coffee or Front of House — then set the Device Type to either Bump or Pass.
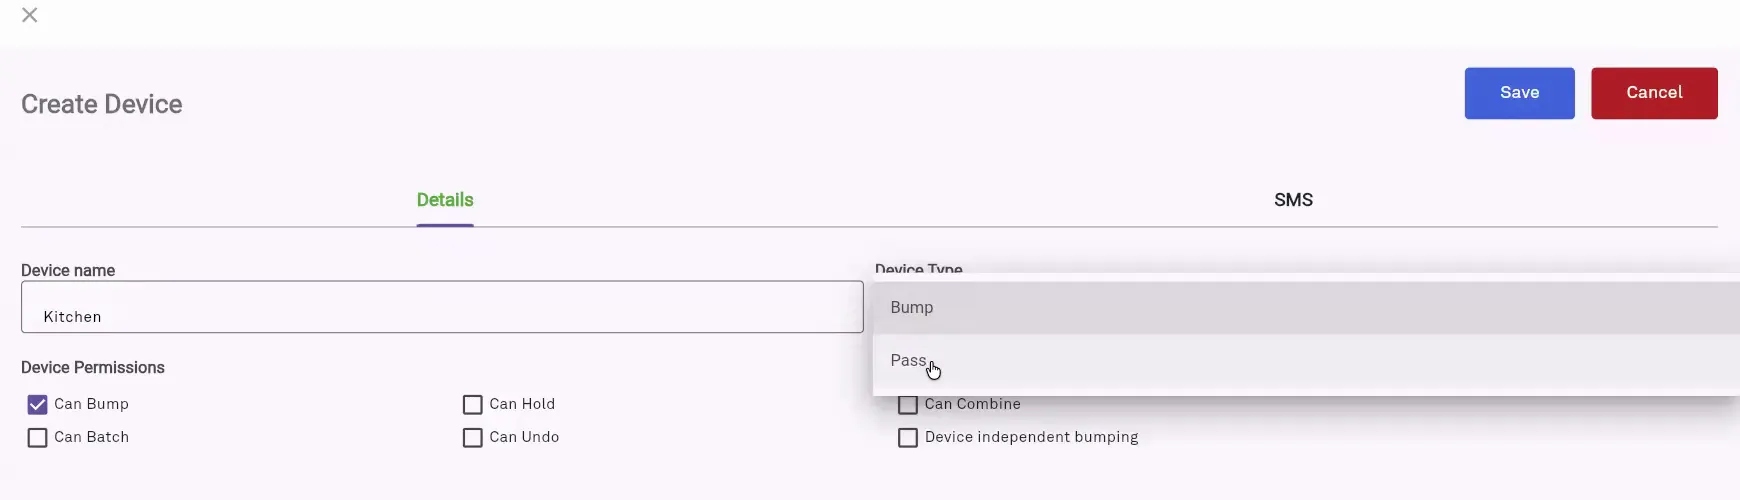
Step 2 — The Create Device page. Tabs are Details and SMS; Save and Cancel are top right. The Device Type dropdown offers Bump and Pass.
Both work exactly the same. The difference is that when you bump on a Bump screen, those items tick off on the Pass screen.
Think of a pass screen as the paper docket you’d normally put down at the pass with the food, so front-of-house staff know where to take it.
Each subscription gives you one Bump device and one Pass device.
Part B — Set the permissions
Step 3
Tick the Device Permissions this screen needs — Can Bump is already ticked by default — then click Save.
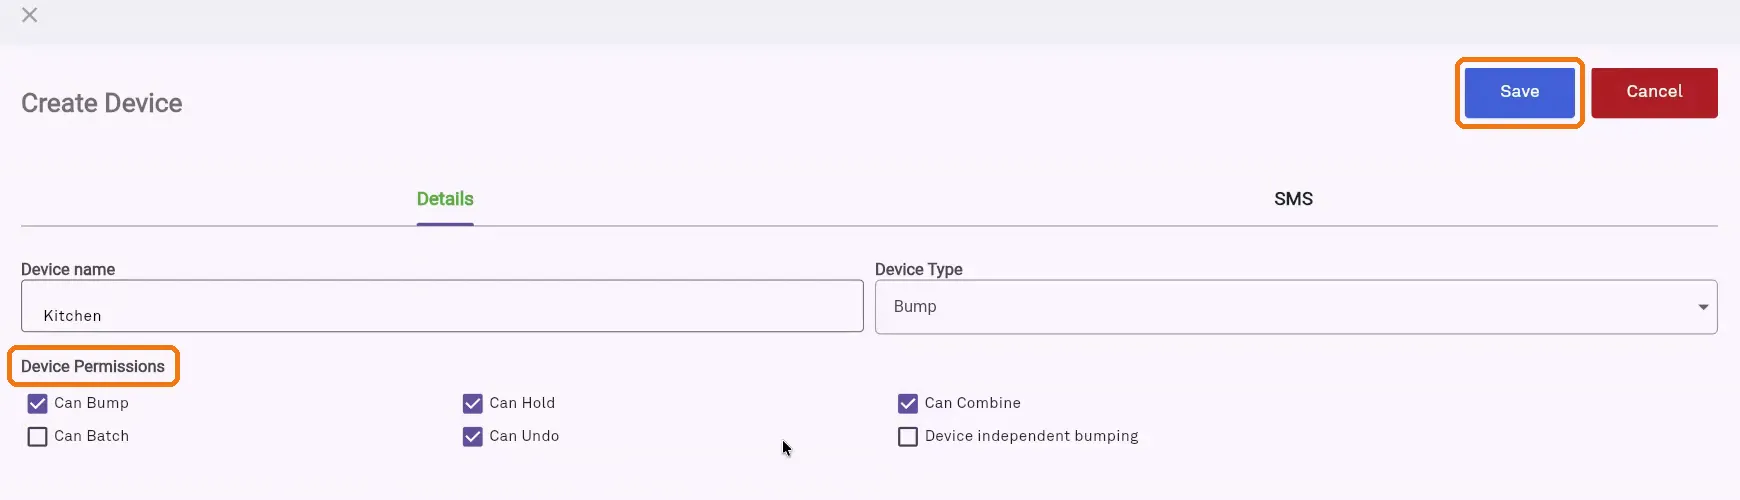
Step 3 — Shown with the four recommended permissions ticked: Can Bump · Can Hold · Can Combine · Can Undo. Leave Can Batch and Device independent bumping off unless you need them. Save is top right.
| Permission | What it does |
|---|---|
| Can Bump | Bump dockets off the screen. Ticked by default. |
| Can Hold | Move a docket into its own held section and bring it back later. Useful when a customer is running late, or for phone orders that need holding until a set time. |
| Can Combine | Group separate dockets into one on the screen in real time — for when a group orders and pays separately. |
| Can Batch | Group items for large batch cooking, using the all-day count in the statistics sidebar. |
| Can Undo | Unbump a docket from Order History. It returns to the exact position it was in when bumped. |
| Device independent bumping | Bumping here does not remove the docket from other screens. Use it where sections look after their own items — if fryer bumps a docket, it stays on the grill screen. |
Step 4
The device is added. Your site row now shows a green Go to bump screen button.

Step 4 — The green Go to bump screen button is circled above.
Repeat for each screen
Go back to Step 1 on each device you want to add — every bump screen and every pass screen in the venue.
Check before moving on
- ☐ Each device was added on that device, not from a computer
- ☐ Every device has a name that matches where it sits in the venue
- ☐ Device Type is set correctly to Bump or Pass
- ☐ Permissions are ticked on each device
- ☐ A green Go to bump screen button appears on your site row
What’s next
| Guide | Covers |
|---|---|
| Guide 3 — Creating & Configuring Filters | Choose what appears on each screen |
| Guide 4 — Using the Bump Screen | Day-to-day use for your staff |
Source: “Bump-it New UI Setup Guide” recording, 28 July 2026, 02:41–07:03. App version v5.3.5-b.
Lightspeed Bump Screen powered by Bump-it · bump-it.io · Percentage Plus Holdings Pty Ltd