
4 of 5
Guide 3 — Creating & Configuring Filters
Lightspeed Bump Screen powered by Bump-it · Setup Guide 3 of 4
A filter controls **what appears on a bump screen**. This is the most important part of your setup.
Time required about 10 minutes per filter
Before you start
- You MUST complete Guide 1 and Guide 2 before starting this guide.
- Decide what each screen should show — for example a Kitchen filter with food only, a Coffee filter with drinks only, or a Show All filter with both.
A filter filters the information you want to see on the bump screen. You can have a different filter for each section, so each screen only shows the products that section makes.
Part A — Create the filter
Step 1
Go to Sites, click Settings on your site row, then click Add Filter.
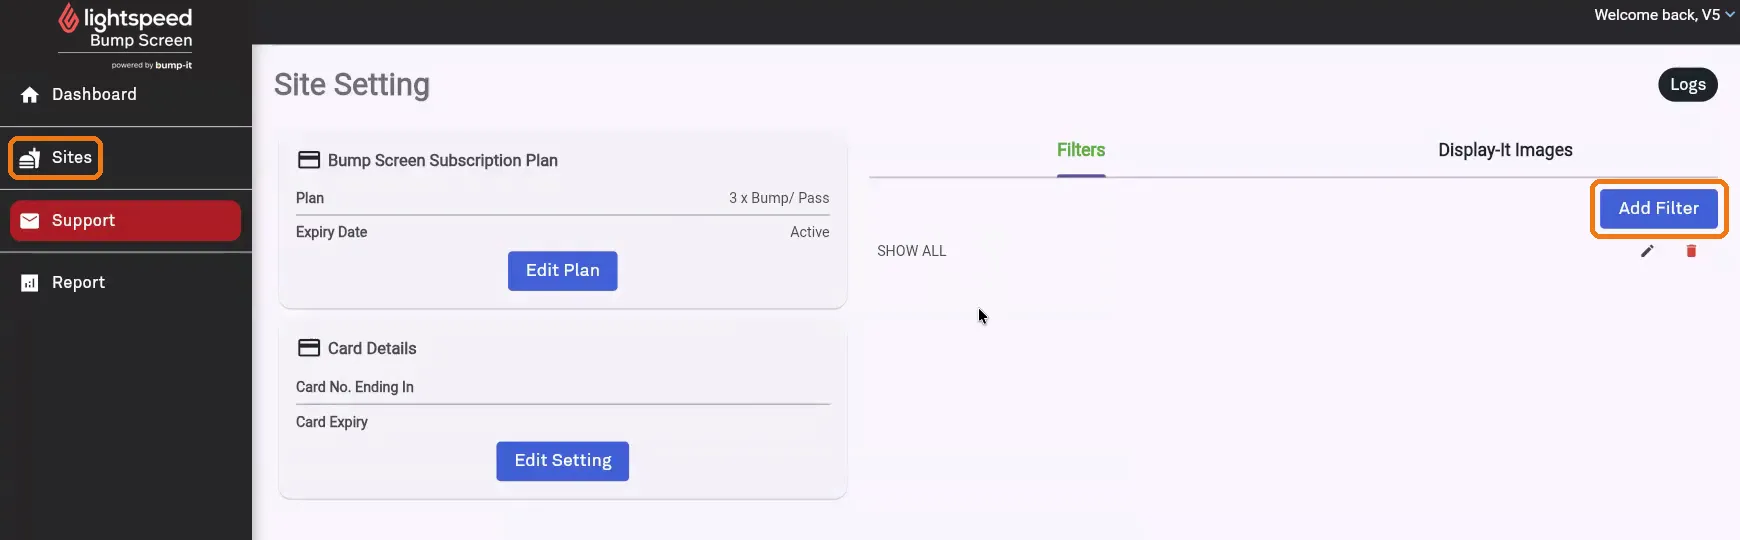
Step 1 — The Add Filter button is circled above. Existing filters (here, SHOW ALL) are listed with edit and delete icons.
Step 2
Give the filter a Filter Name, then set Number of dockets to display.
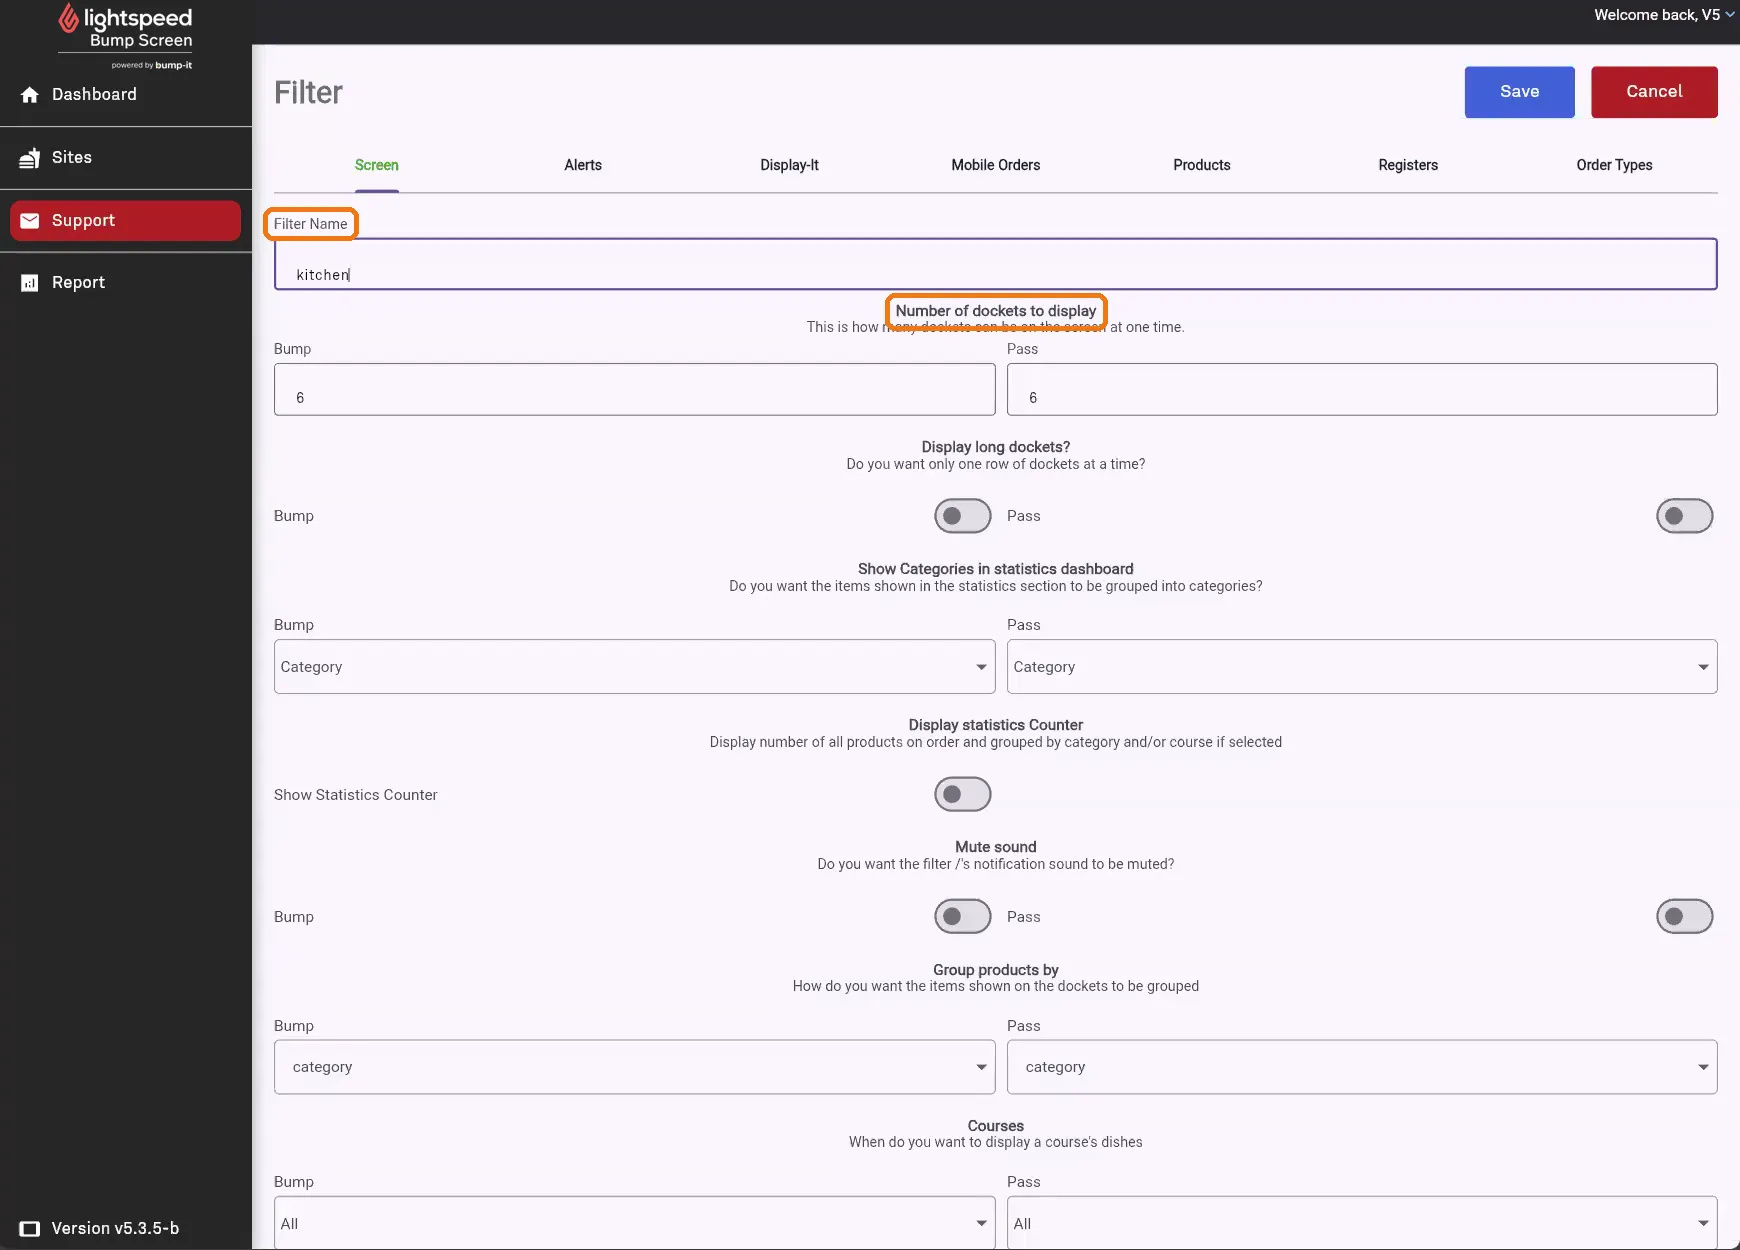
Step 2 — The Filter page. Seven tabs run across the top: Screen · Alerts · Display-It · Mobile Orders · Products · Registers · Order Types. Save and Cancel are top right.
| Device | Recommended dockets |
|---|---|
| Standard iPad | 6 to 8 |
| 20-inch or 22-inch Android | 12 to 16 |
Most settings on the Screen tab have separate Bump and Pass columns, so a bump screen and a pass screen can behave differently on the same filter.
Part B — Screen tab
Step 3
Set the remaining display options on the Screen tab, then scroll down and set the Font Sizes.
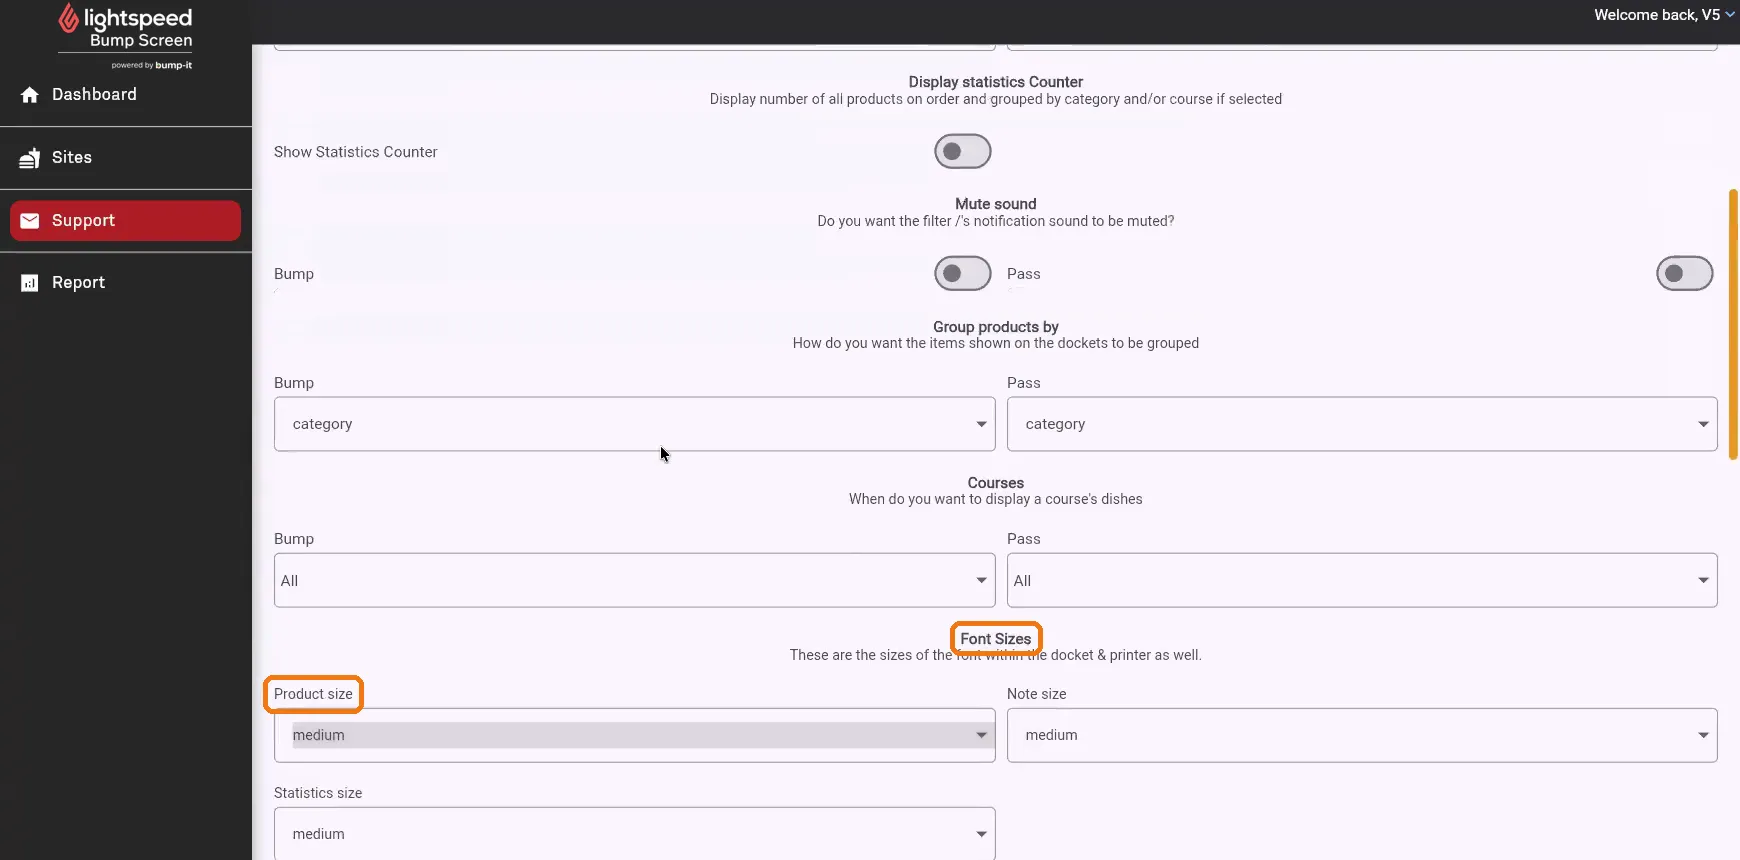
Step 3 — The Font Sizes section, further down the Screen tab. Product size is open here.
| Setting | What it does |
|---|---|
| Display long dockets? | One row of dockets at a time. A long docket takes up three quarters of the screen. |
| Show Categories in statistics dashboard | Groups the statistics sidebar by None, Category or Course. |
| Display statistics Counter | Shows the count of all products on order, grouped by category and/or course. |
| Mute sound | Mutes this filter’s notification sound. |
| Group products by | How items are grouped on the docket. |
| Courses | When a course’s dishes are displayed. |
| Font Sizes | Product size, Note size and Statistics size — the font sizes within the docket and on the printer. All default to medium. |
| Bump All Button | Puts a tick next to each product name on the docket. Tapping the tick bumps every unit of that item at once — so a docket with 5x Flat White clears in one motion instead of five separate taps. The swipe gesture works whether this is on or off. |
Part C — Alerts, Display-It and Mobile Orders
Step 4
Open the Alerts tab and set your three alert timings. The timings are the traffic light system on the docket: when a docket first hits the screen it is green, it turns amber on the first alert, then red on the second alert.
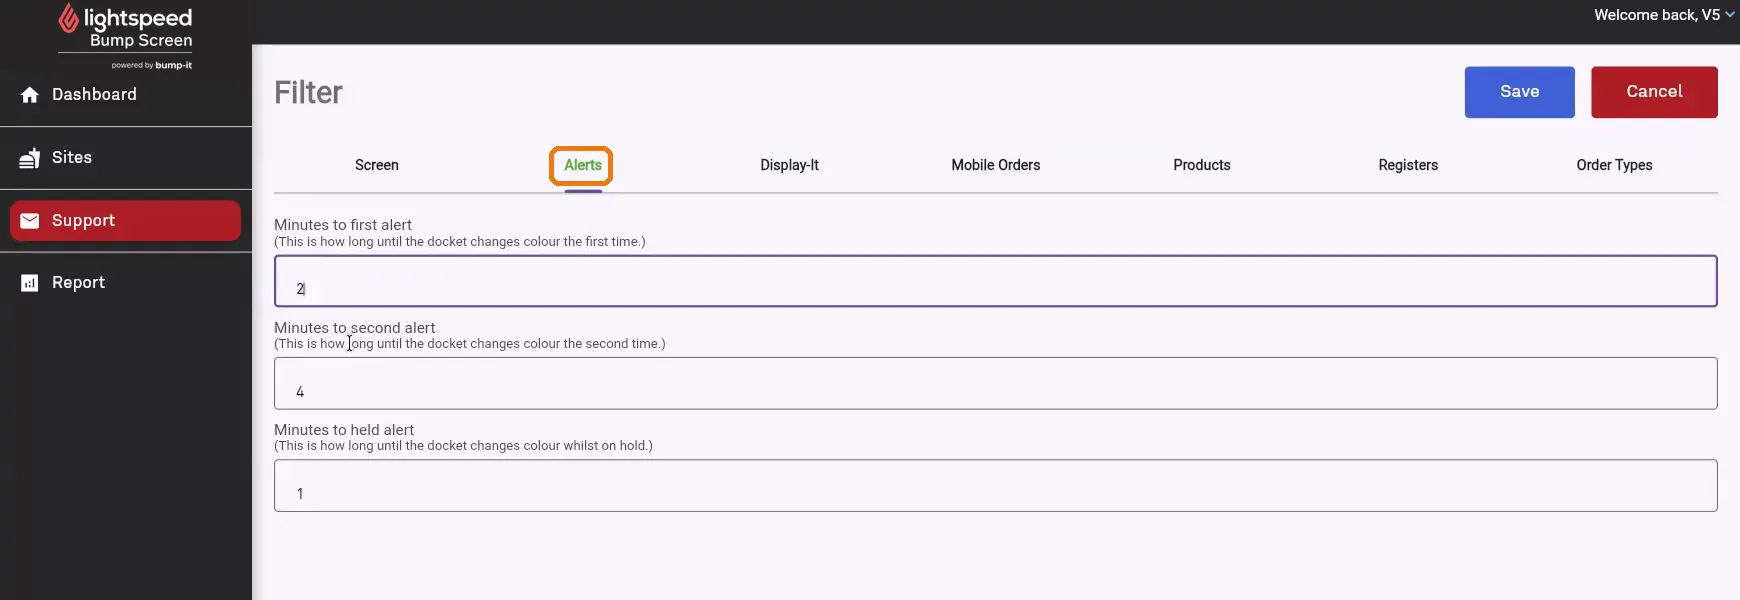
Step 4 — Alerts. Shown here: first alert 2 minutes, second alert 4 minutes, hold alert 1 minute.
Set them to the wait time you promise customers, and the colour tells your team at a glance how close a docket is to being late.
| Field | What it does |
|---|---|
| Minutes to first alert | How long until the docket turns amber |
| Minutes to second alert | How long until the docket turns red |
| Minutes to hold alert | How long until a docket changes colour while on hold |
Suggested starting points:
| Area | Example |
|---|---|
| Coffee | 2 and 4 minutes |
| Kitchen | 8 and 15 minutes |
Step 5
Open the Display-It tab. Turn on Show On Customer Display only if you have a customer-facing screen set up on an external device.

Step 5 — Display-It shows the order name or note once an order is bumped.
Display-It is not a countdown. It does not tell the customer how long until their order is ready — it shows a notification once the order has been bumped and is ready for collection.
Step 6
Open the Mobile Orders tab and set your pre-order delay.
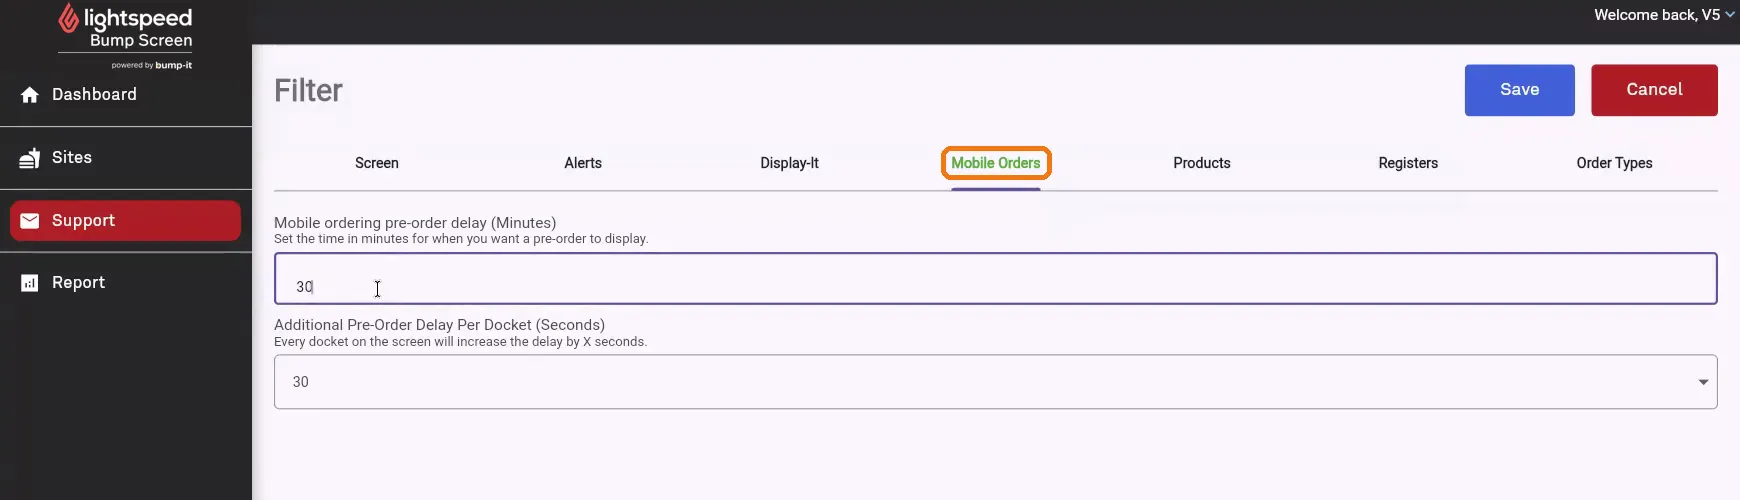
Step 6 — Shown here: a 30-minute pre-order delay and a 20-second additional delay per docket.
This is how far in advance you want to see the order before it’s due for collection. It only applies to orders that have a scheduled time attached to them.
| Field | What it does |
|---|---|
| Mobile ordering pre-order delay (Minutes) | How far ahead of the pickup time the docket appears on screen |
| Additional Pre-Order Delay Per Docket (Seconds) | Adds this many seconds of delay for every docket already on screen |
Example: an order is placed for pickup at 11:30am. With a 30-minute delay, the docket will not appear on the bump screen until 11:00am — giving you 30 minutes to make it.
Part D — Products ⭐
Step 7
Open the Products tab and tick the categories you want on this screen.
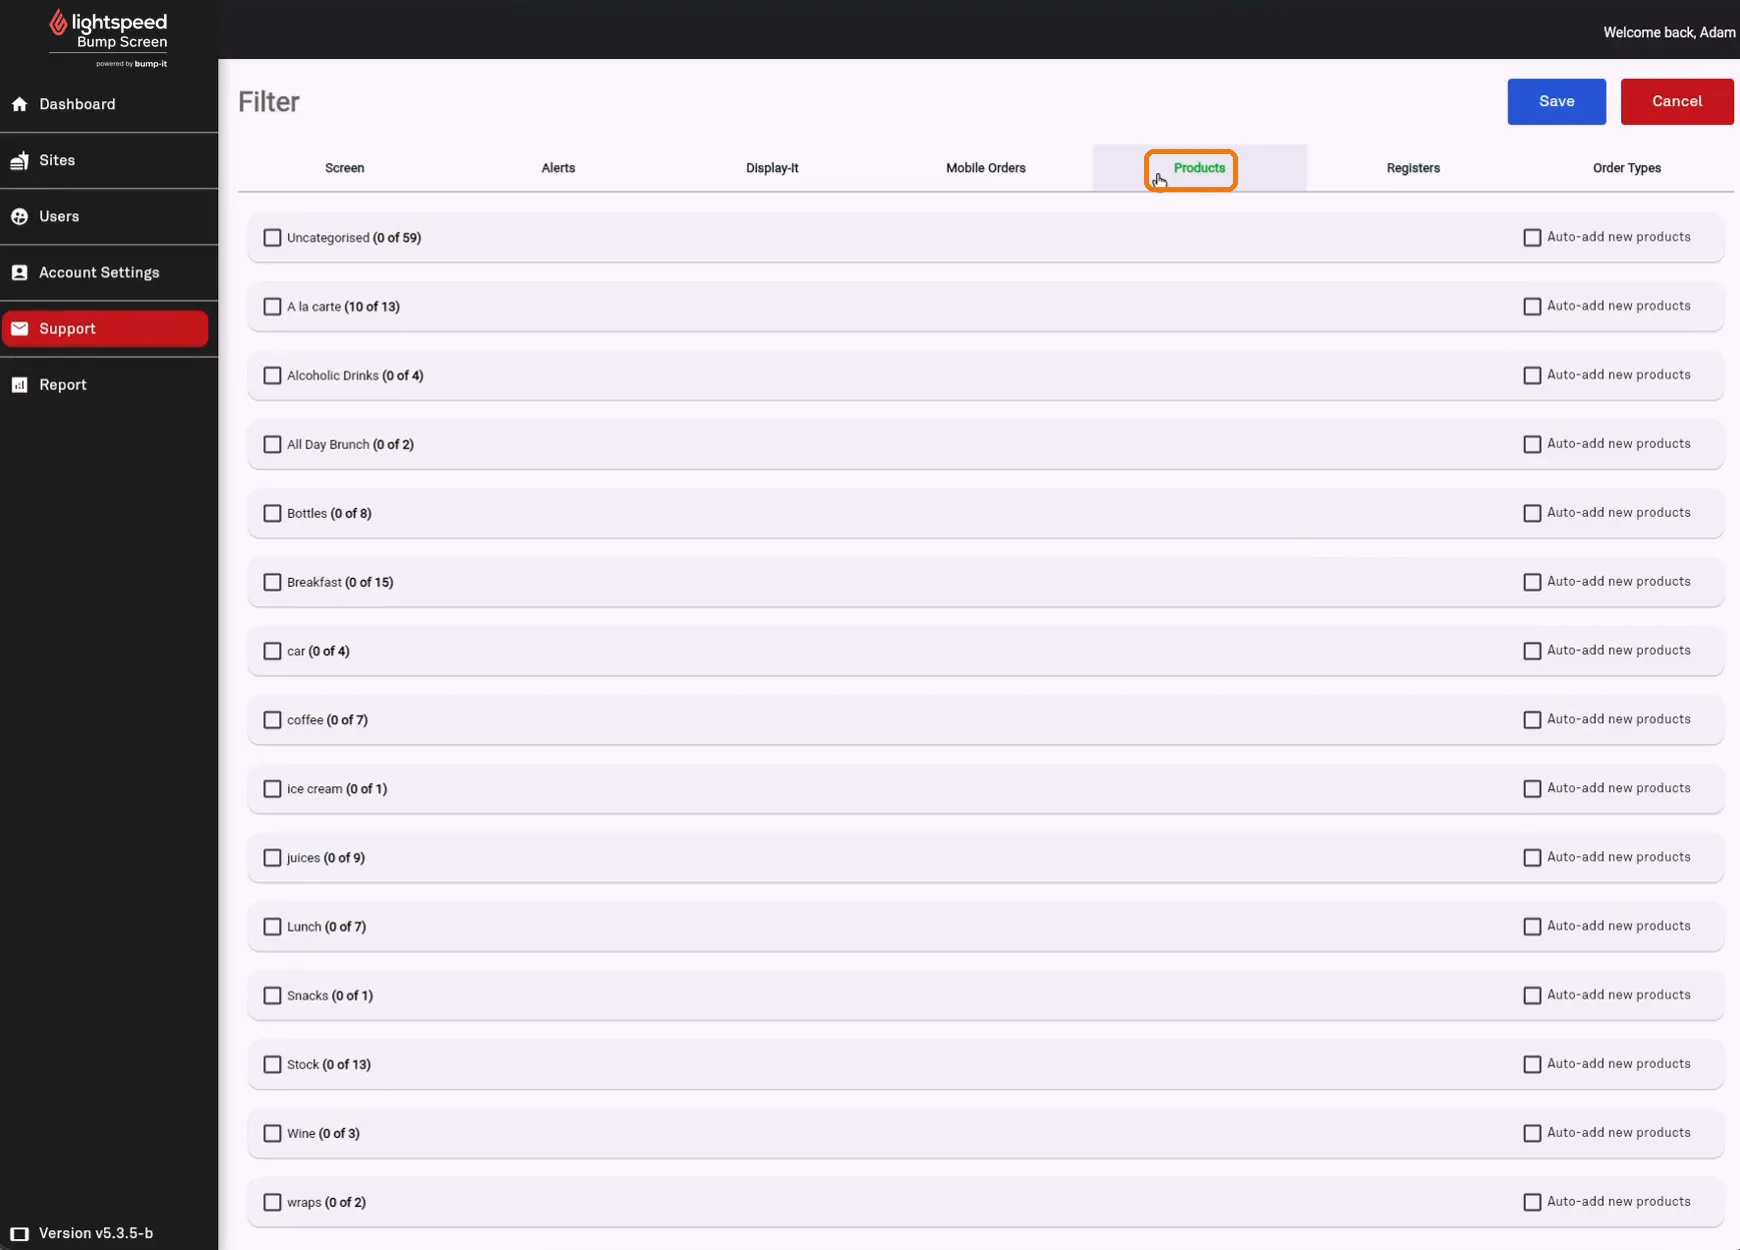
Step 7 — Each category shows how many of its products are ticked — Uncategorised (0 of 59), A la carte (10 of 13) and so on. The Auto-add new products column runs down the right-hand side.
⚠️ This is the number one cause of support tickets
If a product is ordered and never appears on the bump screen, it is almost always because it is not ticked here.
Step 8
To pick individual products instead of a whole category, click the category name to expand it, then tick the items you want.
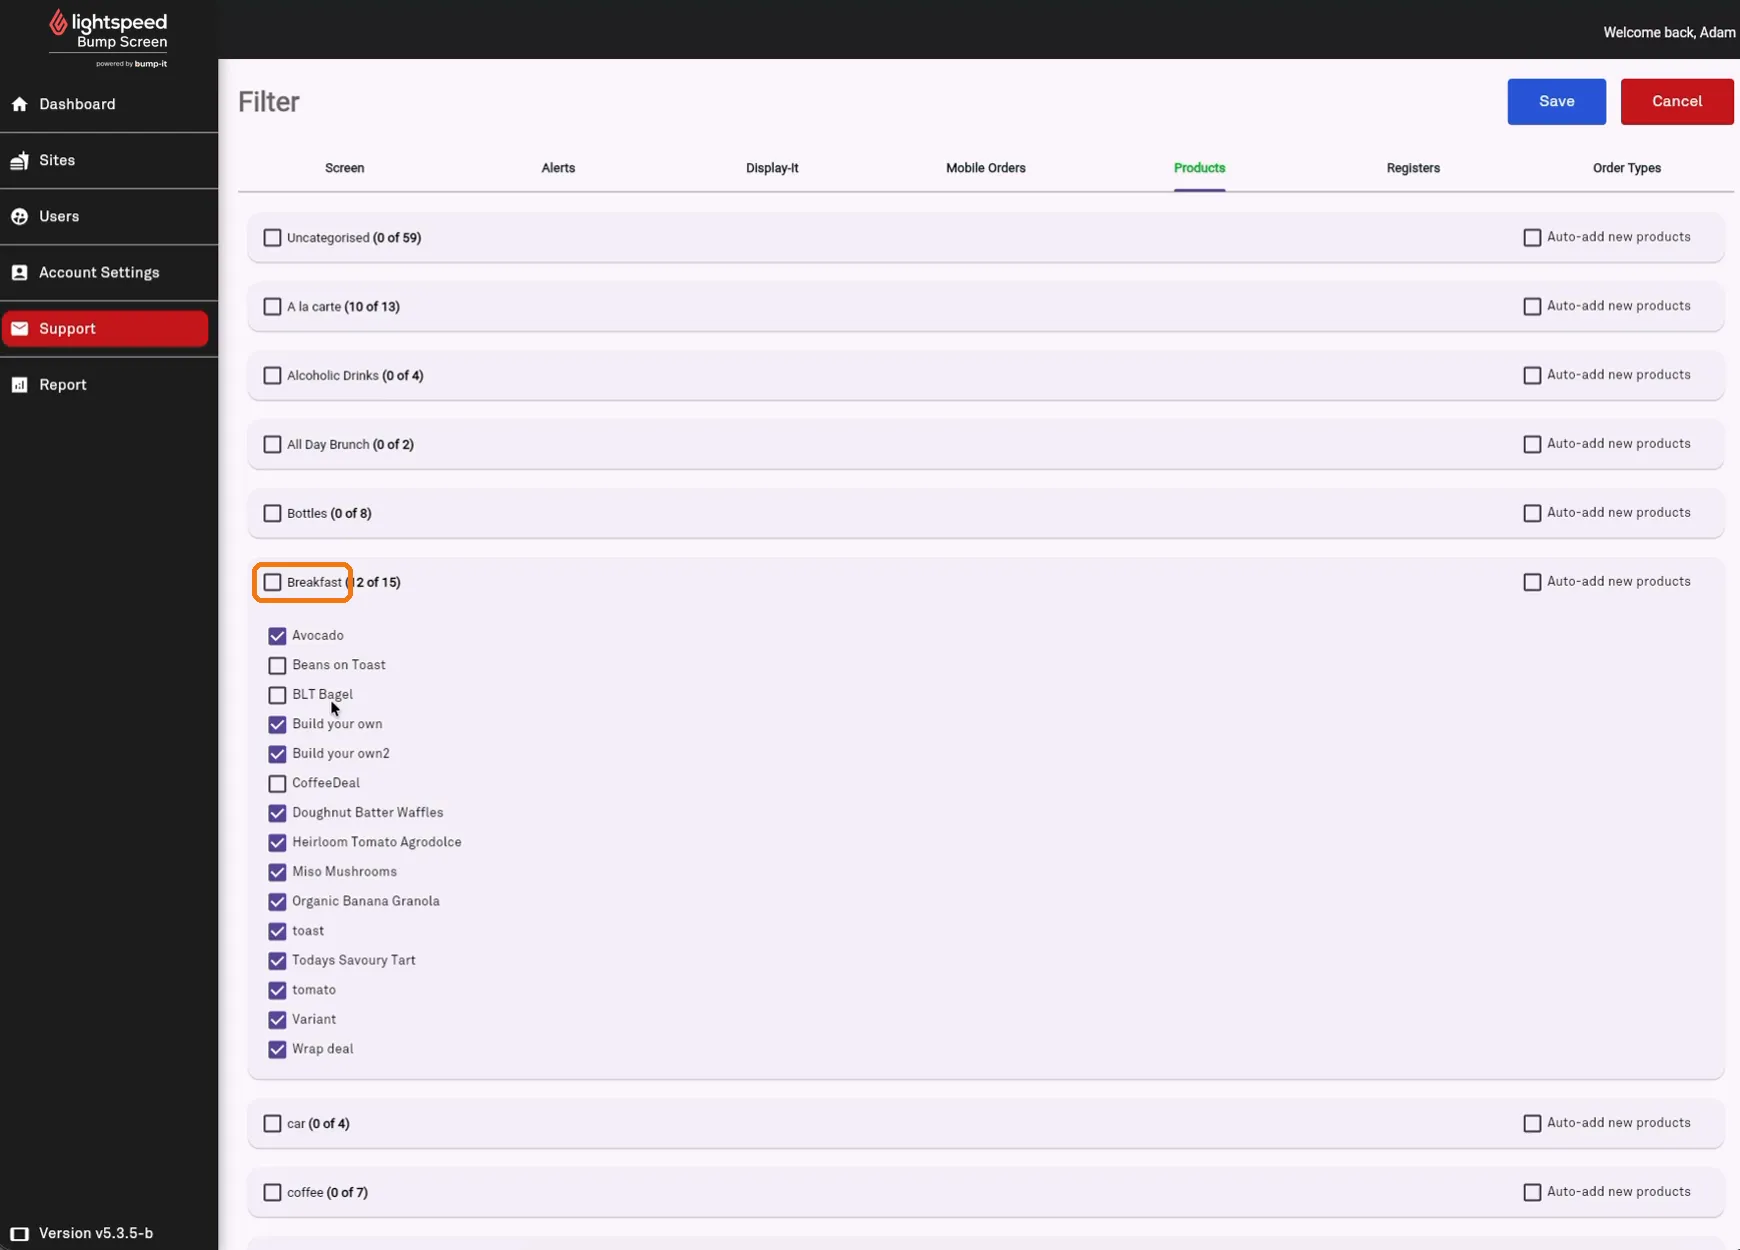
Step 8 — Breakfast expanded with its individual products ticked. The count updates as you go — here 12 of 15.
Step 9
Tick Auto-add new products on any category where you want new POS products to flow through automatically.
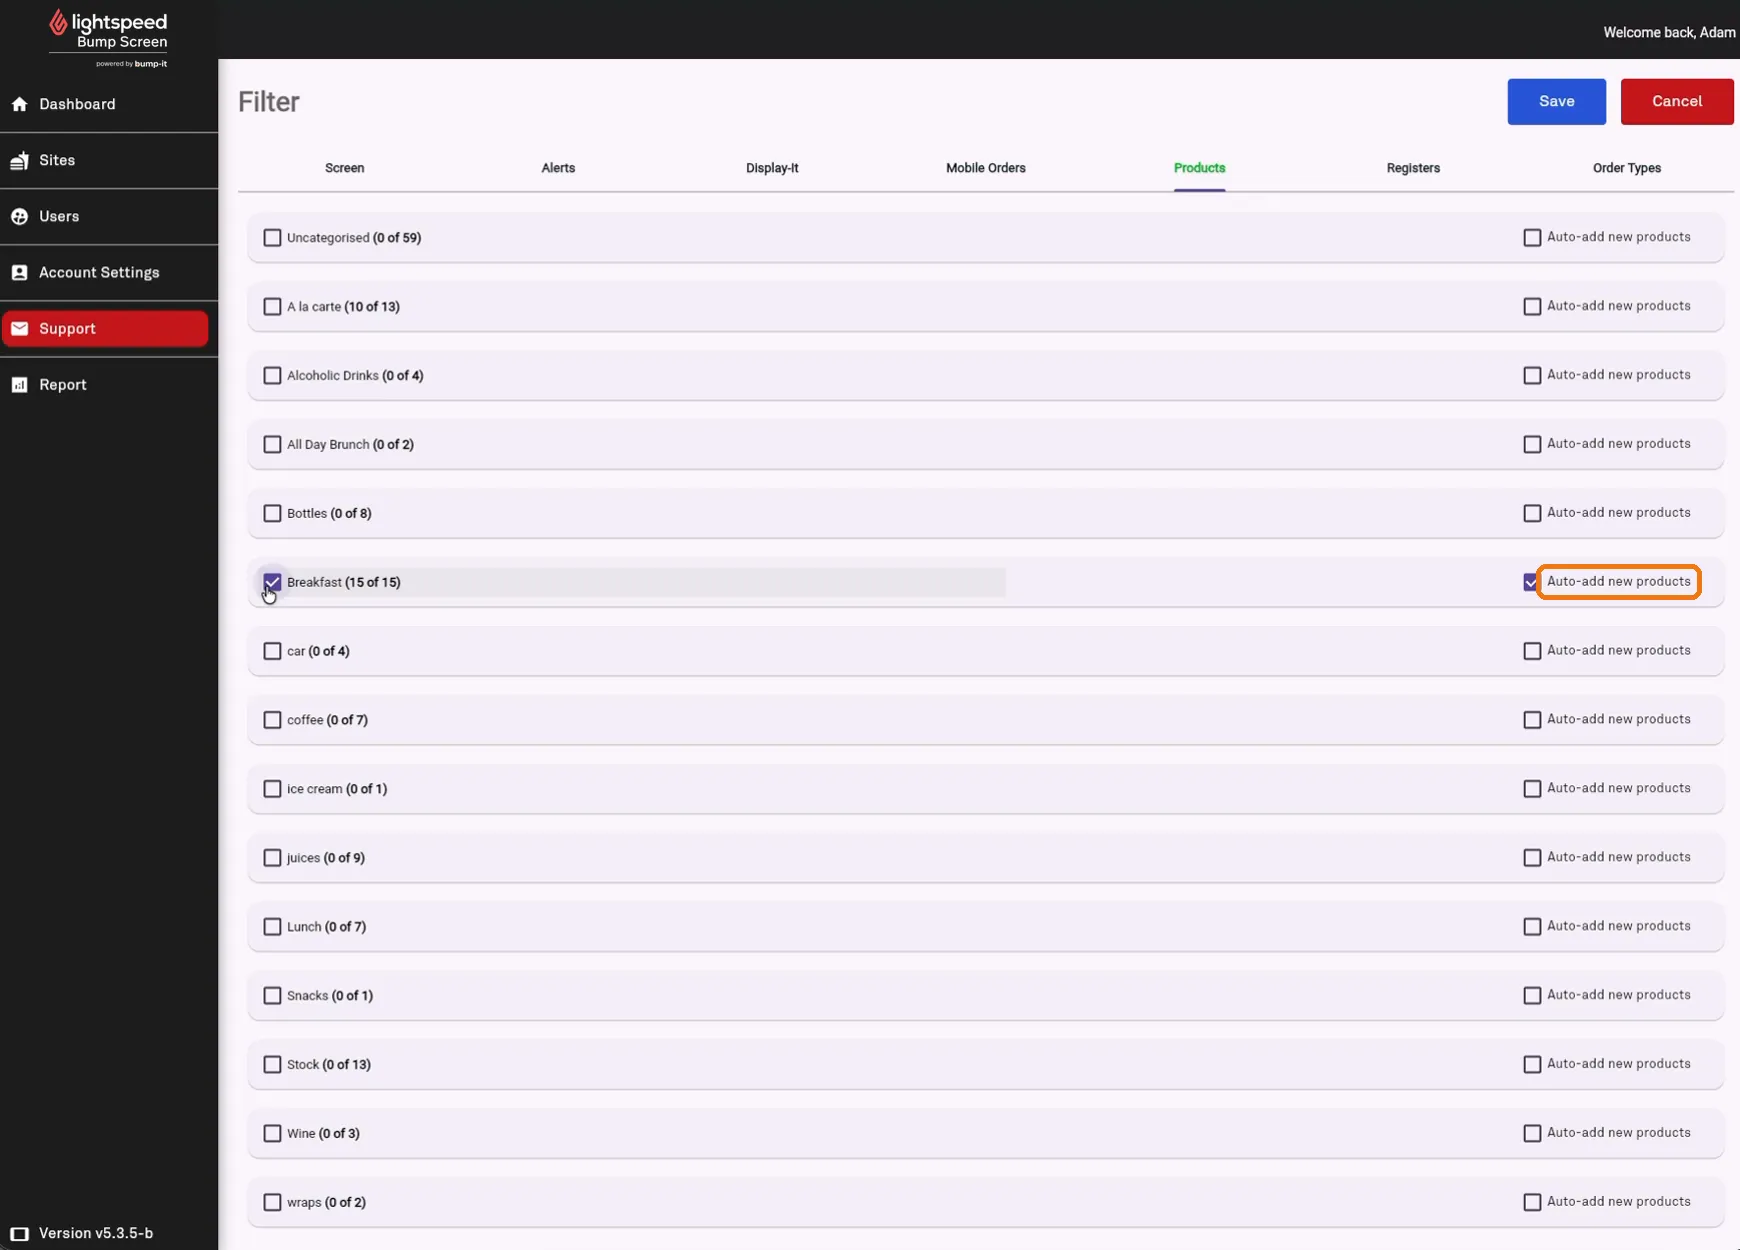
Step 9 — Breakfast (15 of 15) with Auto-add new products switched on for that category.
Recommendation: only leave this on for categories where you have ticked everything. On a hand-picked list, any new product created in the POS would appear on a screen that was never meant to show it.
Part E — Registers, Order Types and Save
Step 10
Open the Registers tab. Leave it blank unless you need specific POS terminals to feed this screen.
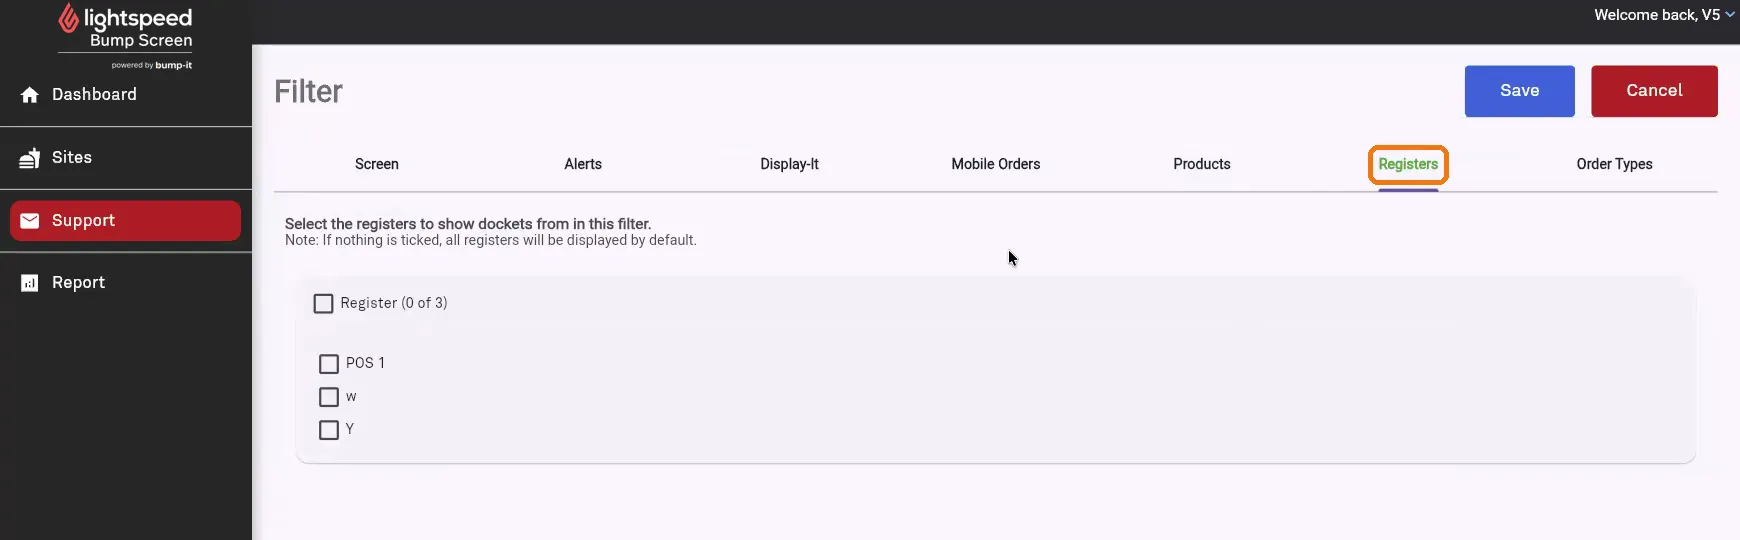
Step 10 — On-screen note: “If nothing is ticked, all registers will be displayed by default.”
When you would use this: an outdoor kitchen. Tick only the outdoor kitchen’s POS terminal, and this screen will only show orders put through that terminal.
Step 11
Open the Order Types tab. Do not tick anything unless you want this screen to show only certain order types.
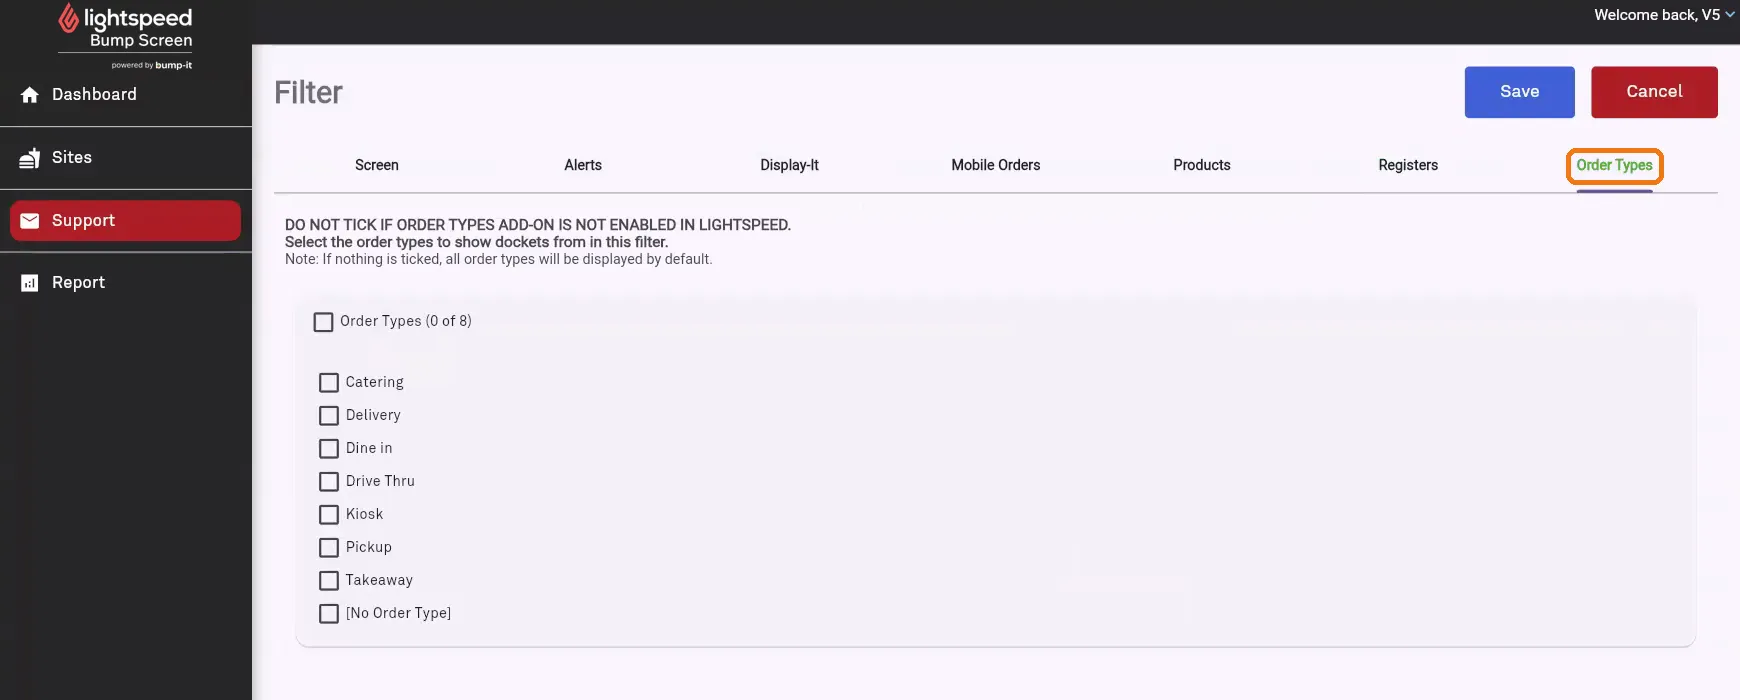
Step 11 — On-screen note: “If nothing is ticked, all order types will be displayed by default.”
Only tick order types if your point of sale sends them. If it doesn’t, leave them all unticked — otherwise dockets may not appear.
The eight order types are: Catering · Delivery · Dine In · Drive Thru · Kiosk · Pickup · Takeaway · (No Order Type)
Step 12
Click Save. You can come back and edit this filter at any time.
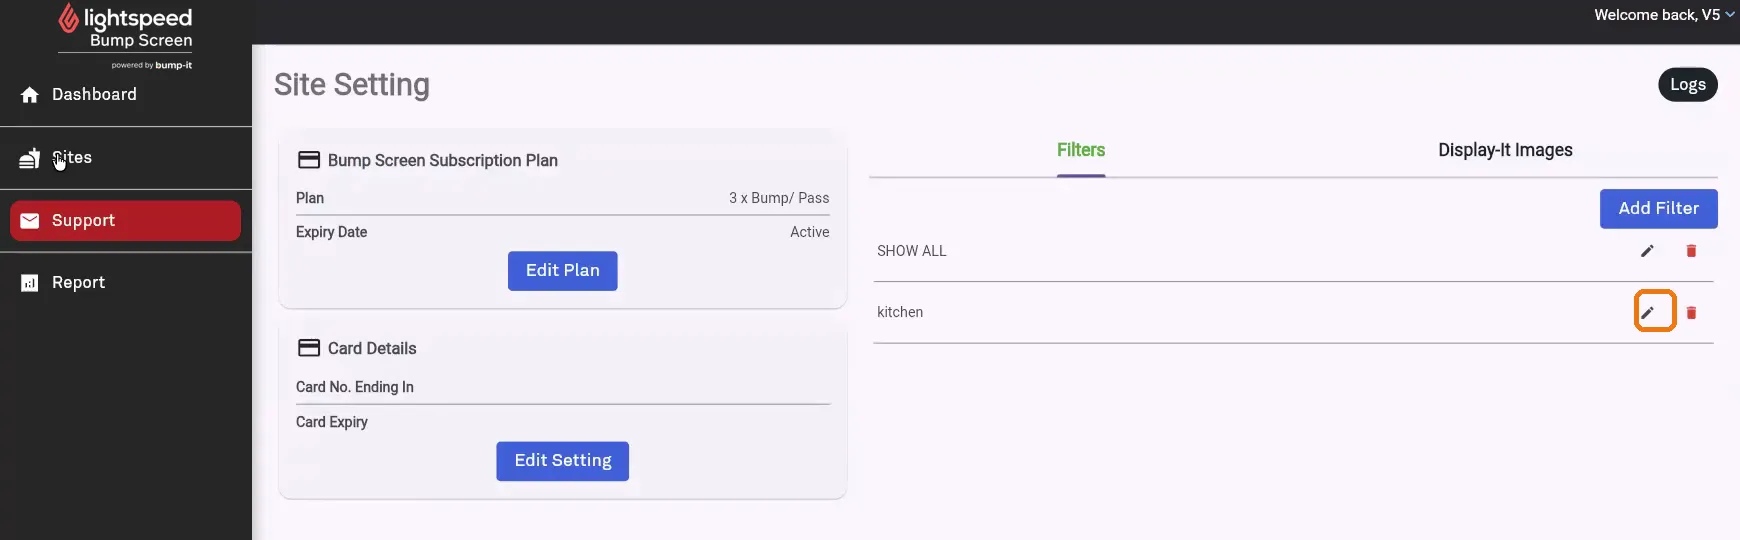
Step 12 — Back on the Site Setting page, your filter is now listed. Click the pencil icon (circled above) any time you need to come back and edit it.
Repeat for each screen
Create a filter for each section that needs its own view — kitchen, coffee, outdoor, pass, and so on.
Check before moving on
- ☐ Every product you expect to see is ticked on the Products tab
- ☐ Alert times match the wait time you promise customers
- ☐ Docket count suits the size of the screen
- ☐ Registers left blank unless you need terminal-specific routing
- ☐ Order Types left unticked unless your point of sale sends order types
What’s next
| Guide | Covers |
|---|---|
| Guide 4 — Using the Bump Screen | Day-to-day use for your staff |
Source: “Bump-it New UI Setup Guide” recording, 28 July 2026, 07:04–13:47. App version v5.3.5-b.
Lightspeed Bump Screen powered by Bump-it · bump-it.io · Percentage Plus Holdings Pty Ltd